How I reupholstered my favourite vintage chair
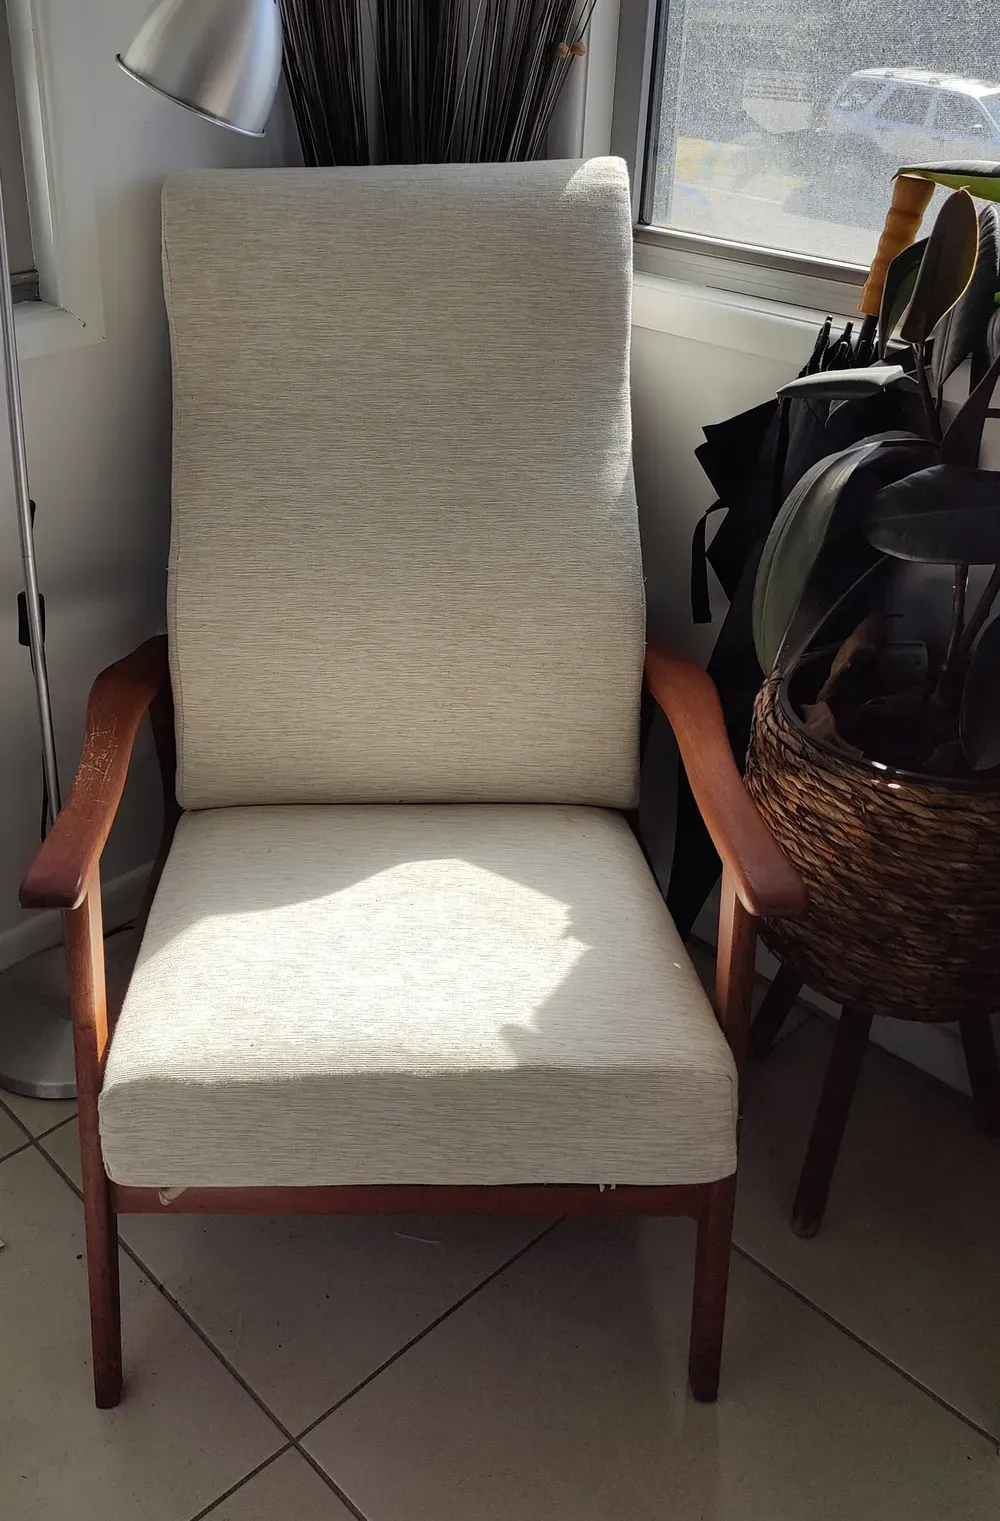
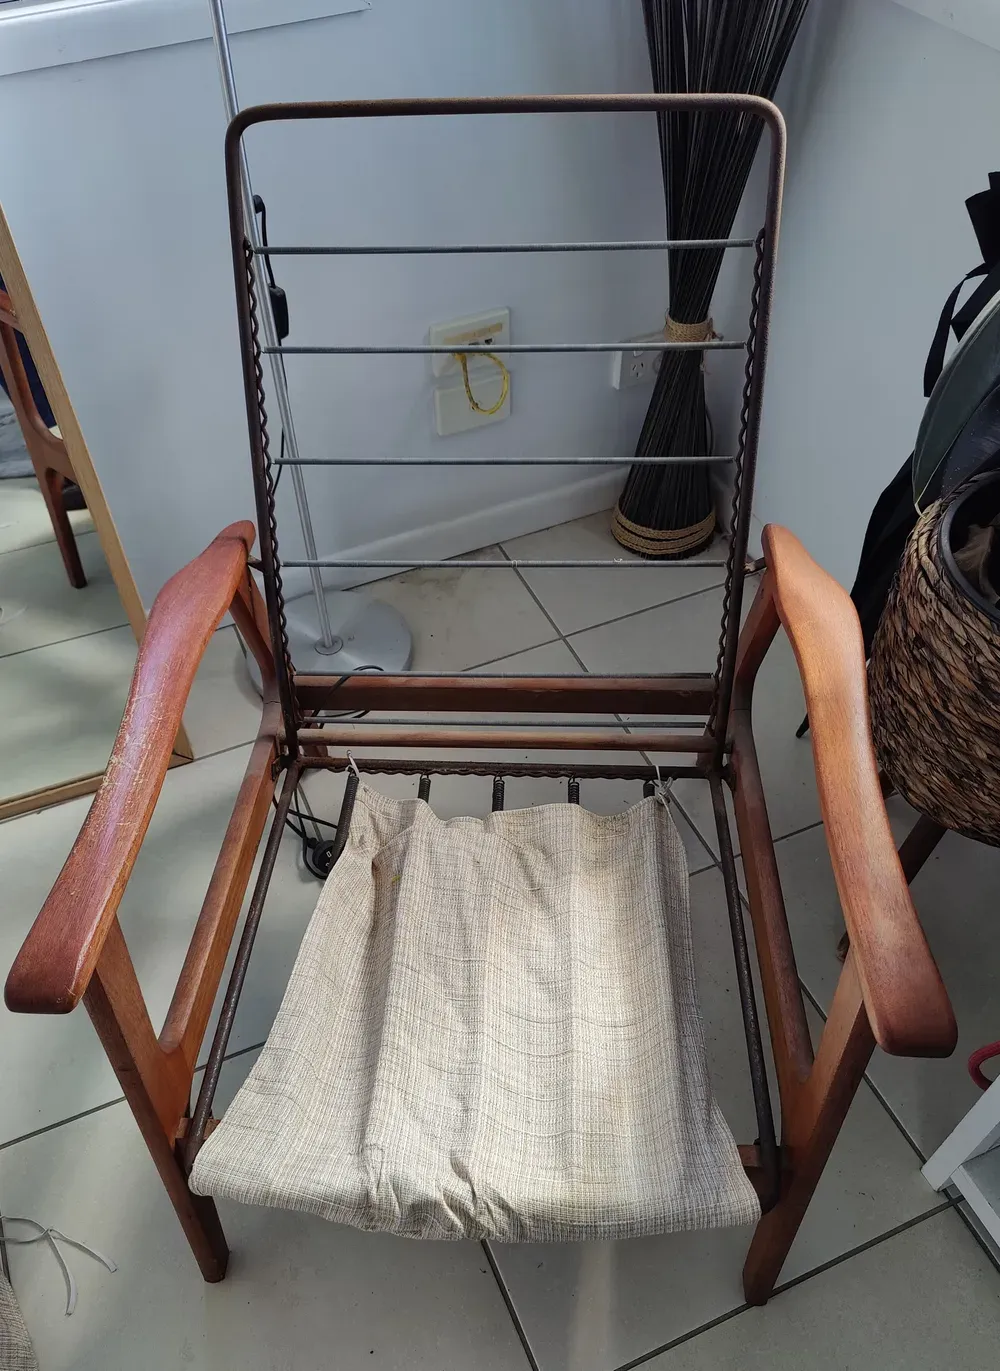
I really wanted to fix up the cushions on my favourite armchair, which is a 1960’s TV recliner that I bought for $20 second-hand about 10 years ago.
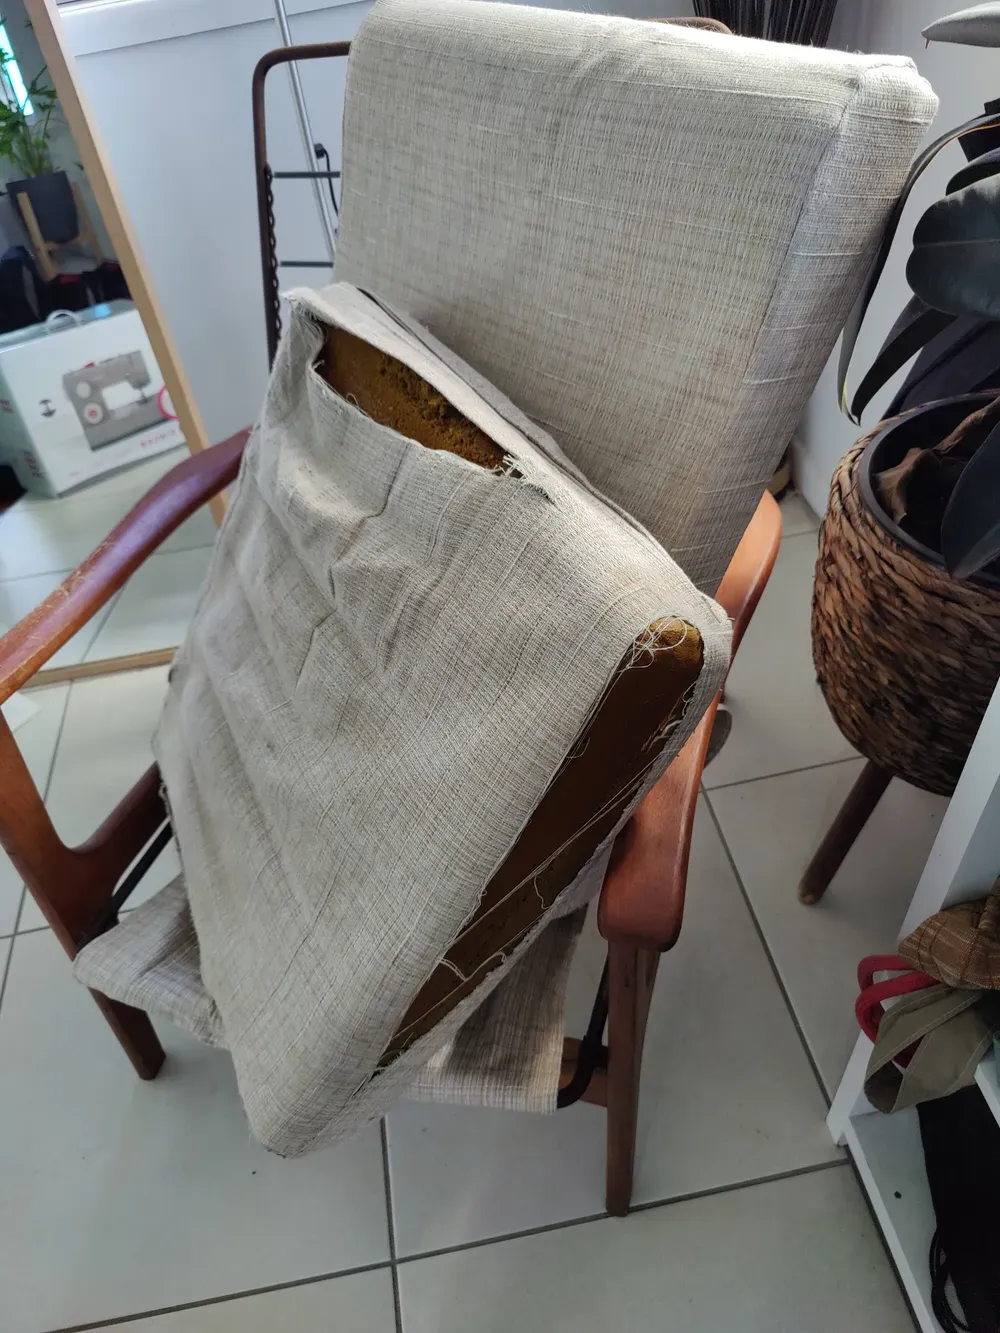
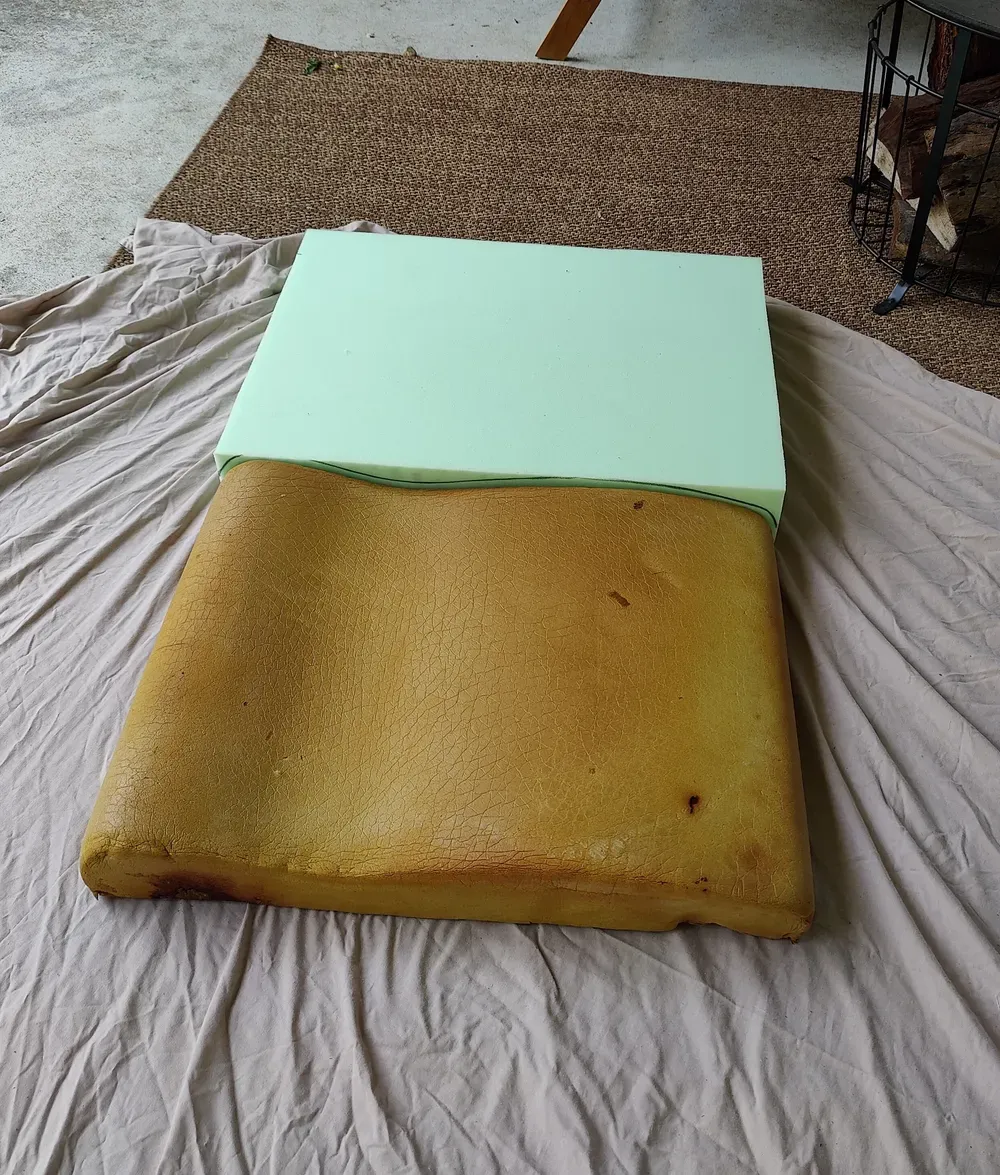
The chair had fabric that wasn’t original. Someone had previously done what I wanted to do, though I wanted to go one step further, replacing the foam as well. That DID appear original - and had become very soft and was falling apart.
I didn’t have a sewing machine and hadn’t used one since year 8 Home Economics class, so I wasn’t too sure how far I’d get. I did it though! It was an interesting, challenging and rewarding project.
Step one - I need (wanted) a sewing machine
There was no way I was going to hand-sew the cushion covers.
I’ve hand-sewed many different leather work items: knife sheaths, wallets, pouches and tool rolls and the latter item was tedious to complete. I had my eye on a heavy duty sewing machine to speed up some of these projects but it took a week or two of consideration and research, and of course, a sad looking armchair.
I settled on a Singer 4423 and added some upholstery thread and fabric, hemming tape, pins and many more things I got on sale (you know, just in case)
I was delighted to find a fabric similar to the original which I really liked.
The Singer 4423 sewing machine I chose to purchase to start my sewing journey

Step two - High density foam doesn’t mean it’s firm
It’s a common misconception - one I had till I started this project - that high density means firm. What it actually means is that the foam can withstand more pressure (by having less air in the foam) and is more resilient (bounces back) compared to lower density foams.
The springs on the chair weren’t that stiff and the old cushions were well worn so it was hard to know what firmness I should get. As it was, you sunk into the chair a little too much. I opted for the firmer option of the foams available. I asked them to cut to size the 2 pieces I needed.
Step three - how do you even do this?
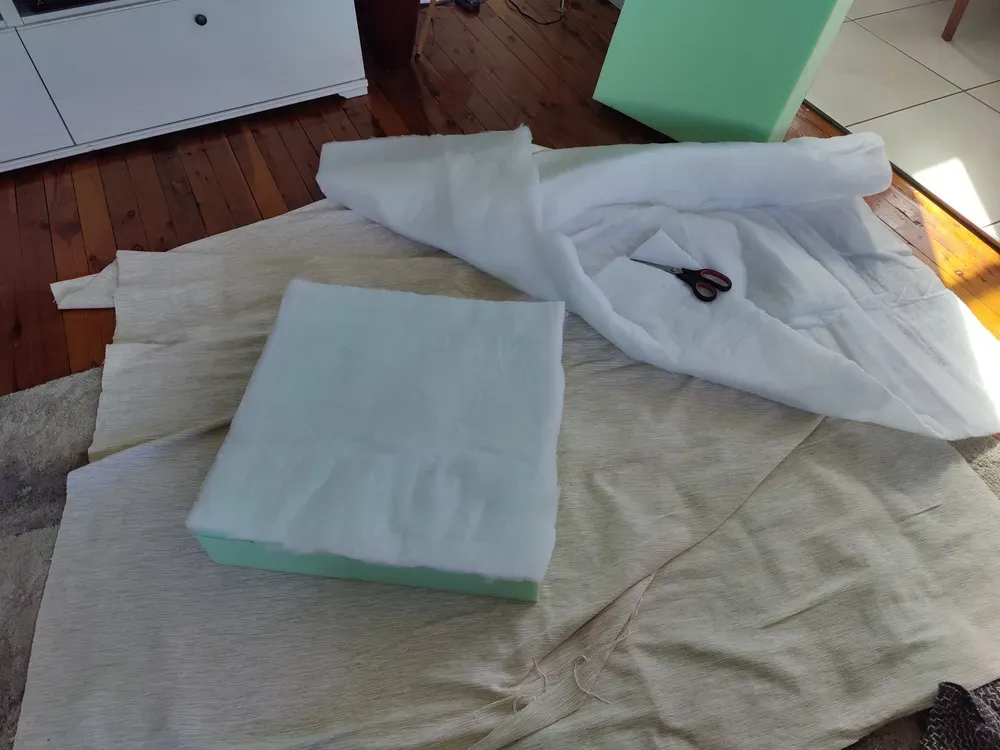
The bottom piece is a ‘simple enough’ box cushion, 500mm by 500mm. I found a really helpful video that showed how to make one of these and that there was a fabric calculator to go with it. After cross referencing with a few other videos around techniques, I decided to add some wadding to the cushions as well for a more even ‘plump’ look. I didn’t want a gaunt cushion. I used aerosol adhesive for attaching the wadding to the foam.
Now came the time to use the sewing machine. After reading the manual like a reasonable person, I did some test runs on an old shirt. This is how I learned about bird nesting, one of the most infuriating things that can happen when you sew.
It essentially causes your machine to lock up in a bundle of thread that has layered itself like a nest, under your fabric. Can be caused by incorrect tension, not using the right needles, not threading the needle correctly, or in my case, forgetting to put the pressure foot down… so. many. times. Though at one point, I had noticed that the thread had come off one of the upper guides, and that caused it as well.
Alas, I was consider upgrading the seam reamer tool that came with the machine, for something a little more comfortable for long hours of ‘unnesting’. But I got the hang of it. The tensioning, threading and speed too.
This cushion was pretty fun to make in the end and I found myself looking around for other cushion covers that needed (or didn’t need) replacing.
Step four - a little less square
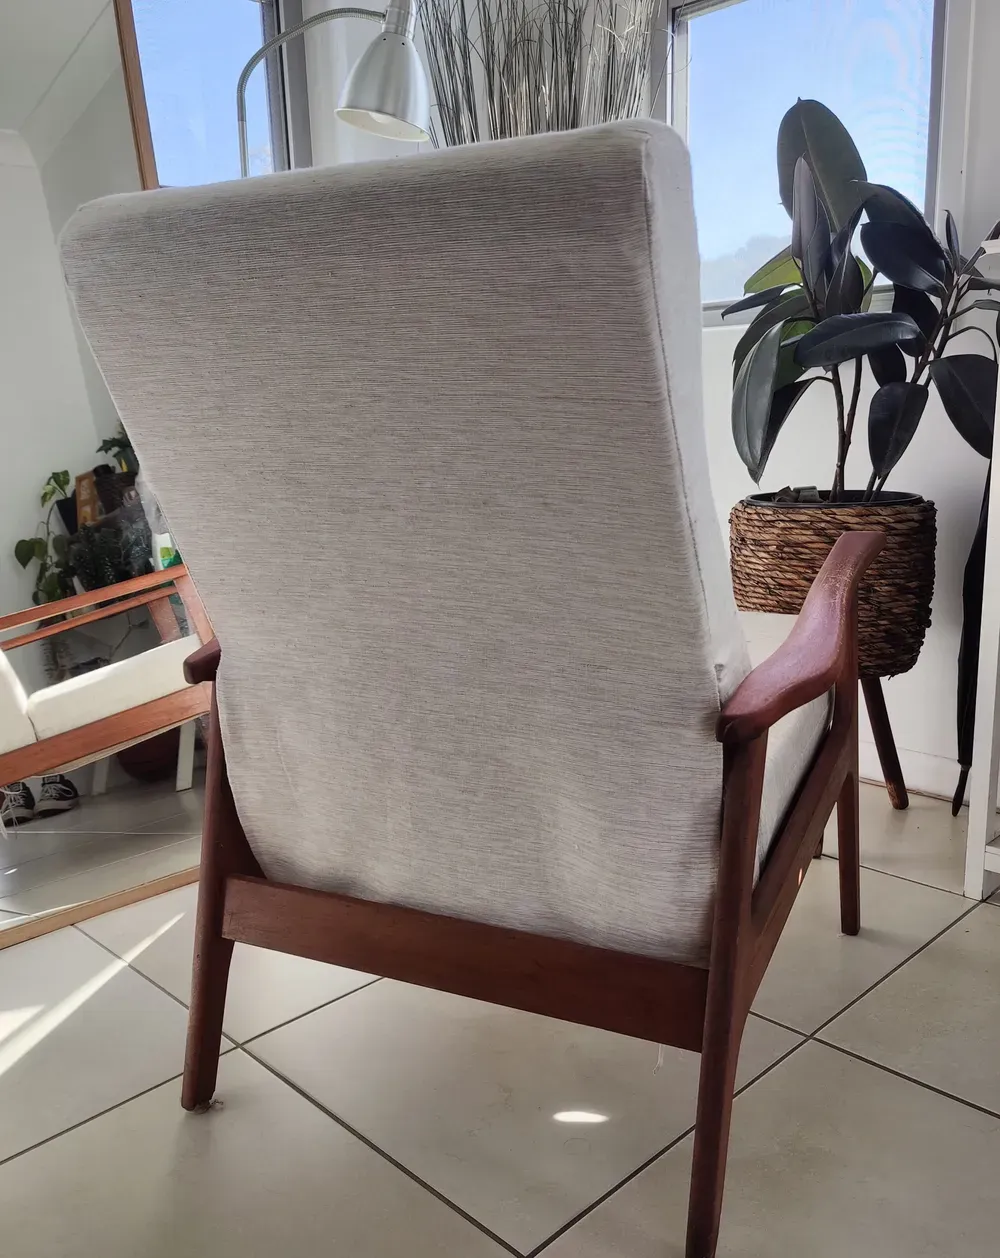
I was a little intimidated by the back cushion. The original had sculpted curves and the fabric acted as a cushion cover and sleeve. That’s how it attaches securely to the back of the chair. There are certainly harder things to upholster and sew but it’s more than your run of the mill box cushion.
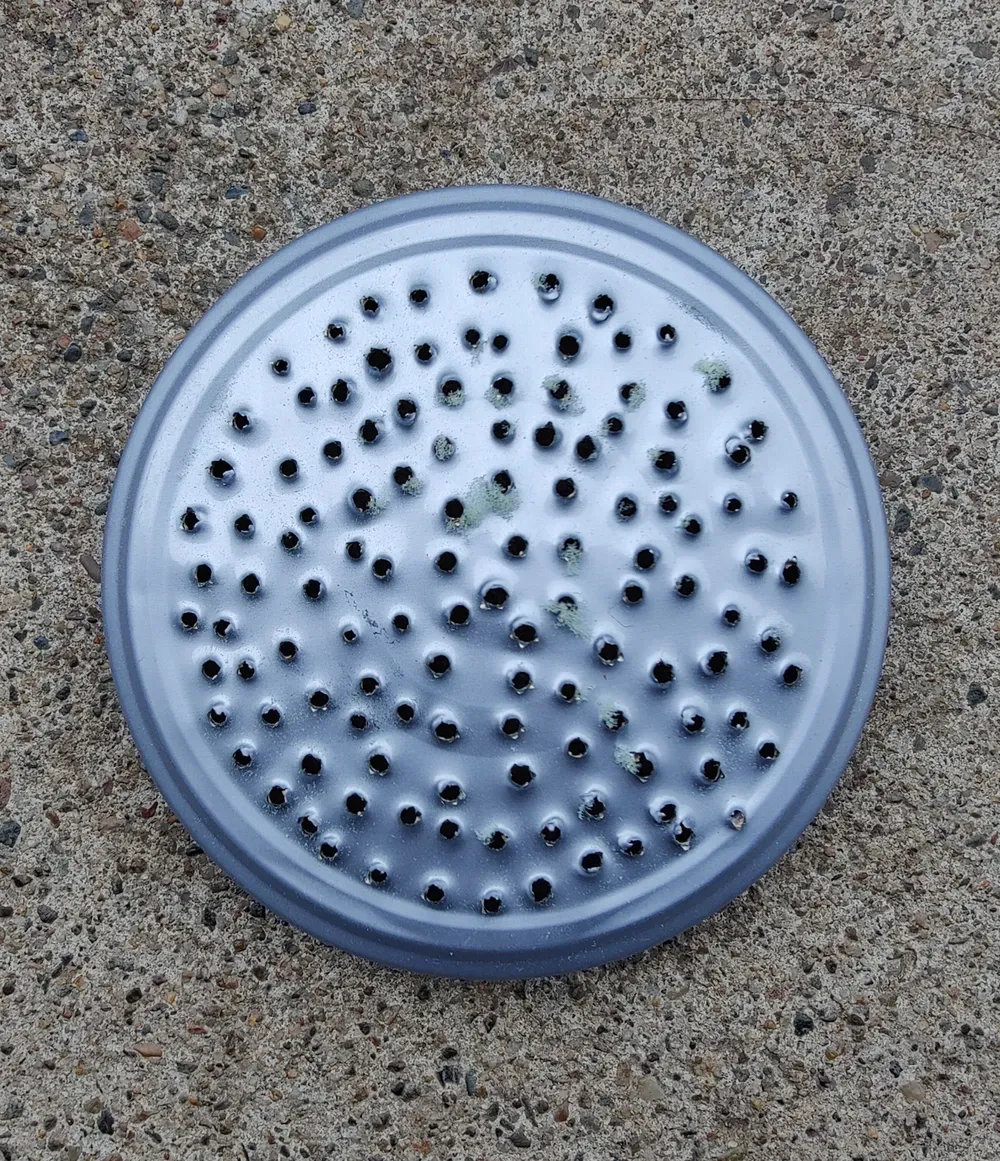
So again, I watched some videos on techniques to shape foam and made a grater tool from an old jar lid - which worked really well!
I traced the profile of the old cushion onto the new piece of foam and began carving away the excess with a serrated knife, reducing the bulk with a ‘strip it’ disc on my drill, and then using the grater to do the more detailed work. I finished with some fine grit sandpaper to remove the pilling left from scraping and was very happy with the result.
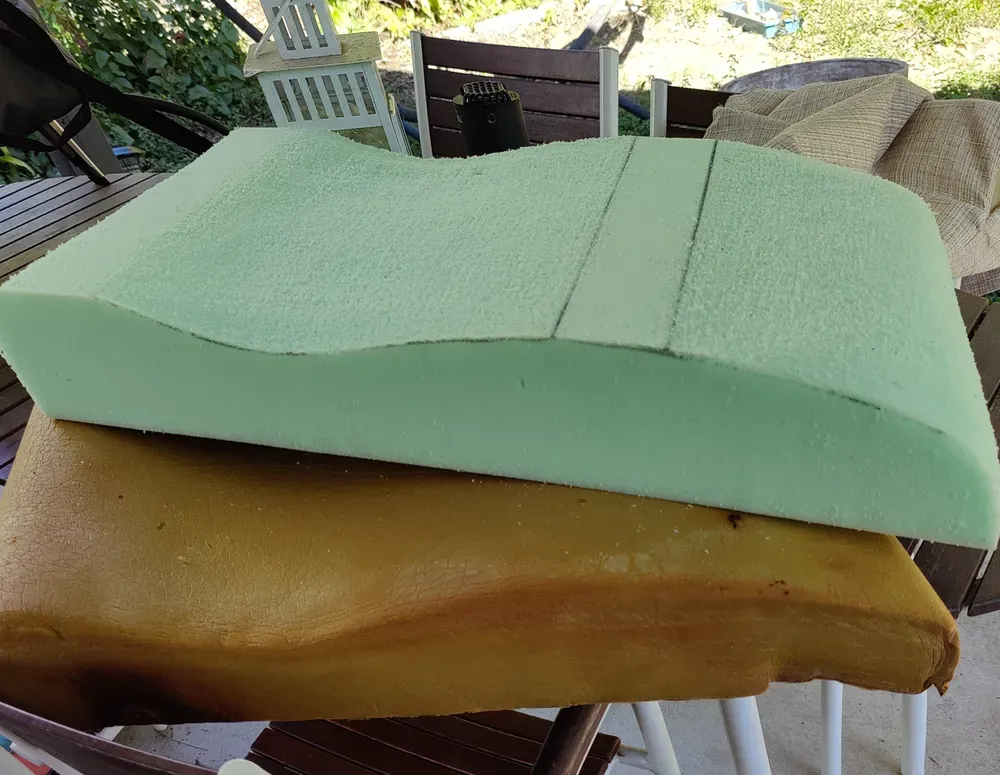
A word of warning though, the foam WILL go everywhere and attach itself stubbornly to your clothes.
Step five - sewing the sleeve cushion cover
I couldn’t really use the original sleeve as a template because the fabric had deteriorated to the point where it was hard take apart without tearing through it. I could take some measurements from it, but I essentially needed to recreate the entire thing. I wanted to make sure it fit the new piece of foam as well, not the old.
So I measured and cut the fabric pieces I needed, arranged and pinned it ready to sew on the side gussets.
I got this wrong first go. I sewed on the sides upside down and back to front. It was a great time.
I found it challenging to think about how the shapes needed to come together on the outside whilst working on the inside.
I needed a sound board to work through it with me and temper my growing frustration. Luckily my partner makes a great one! So we started to arrange the pieces on the foam and measure from there. The good news is that I cut the fabric to the correct dimensions so it was the sequence of work and how the seams needed to come together that took some thought.
Armed with a plan, I could feel the end near! This time I sewed the pieces on correctly and didn’t do too bad of a job with sewing the concave and convex curves of the sides. Going slow is key when starting out. Though, I’d become quite proficient at seam reaming by that stage!
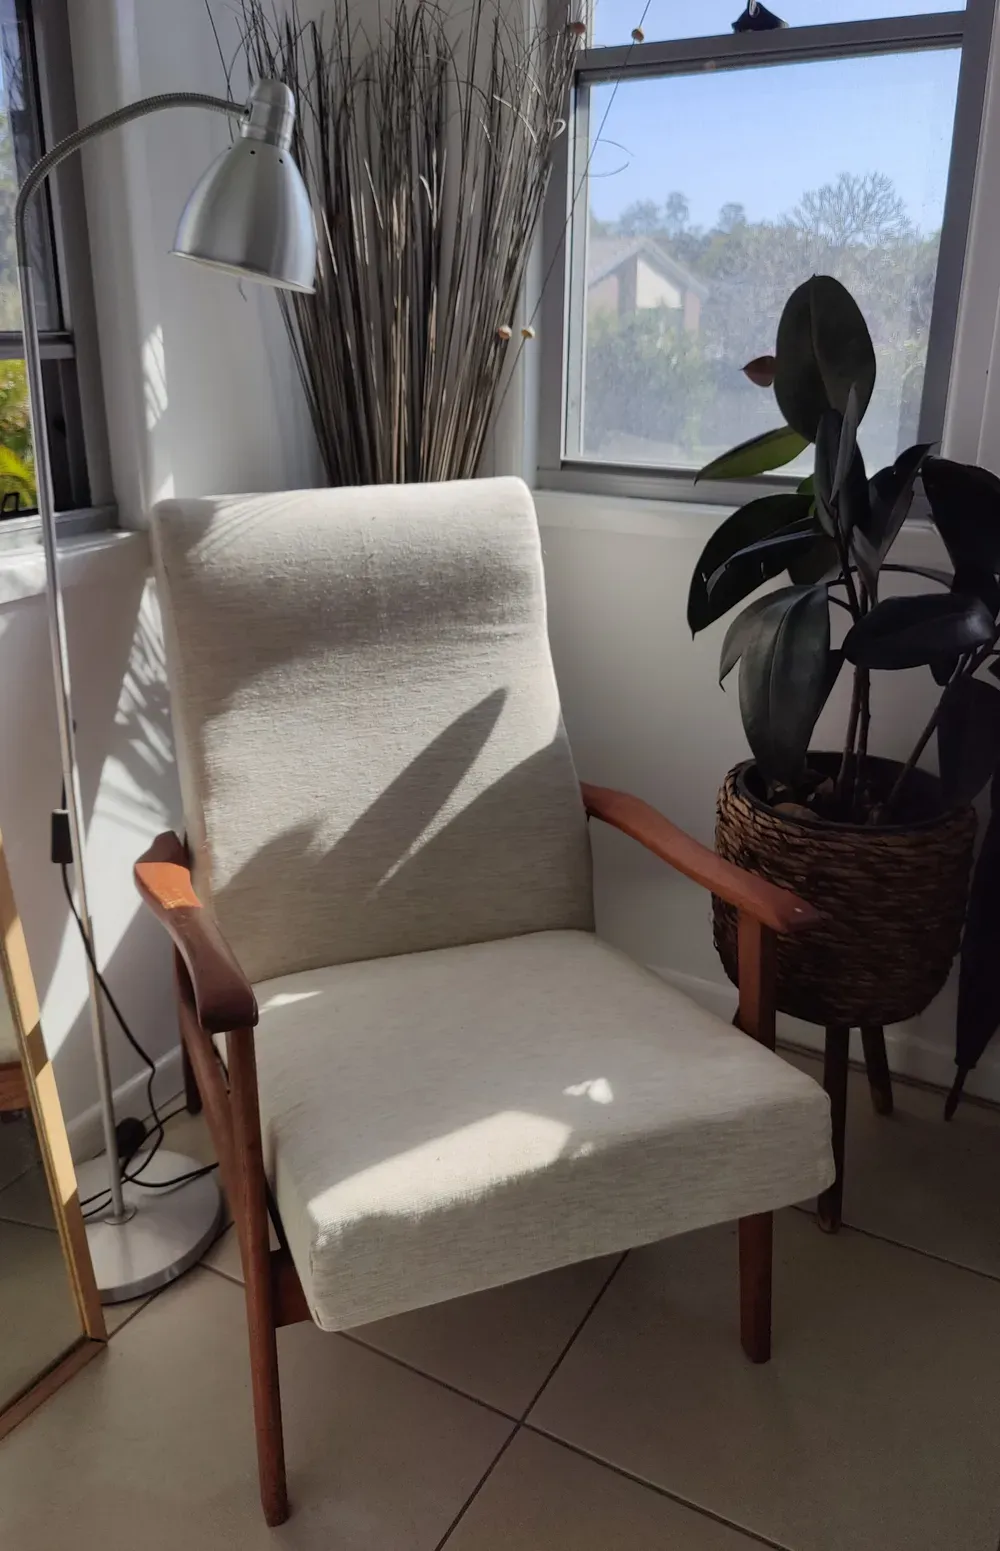
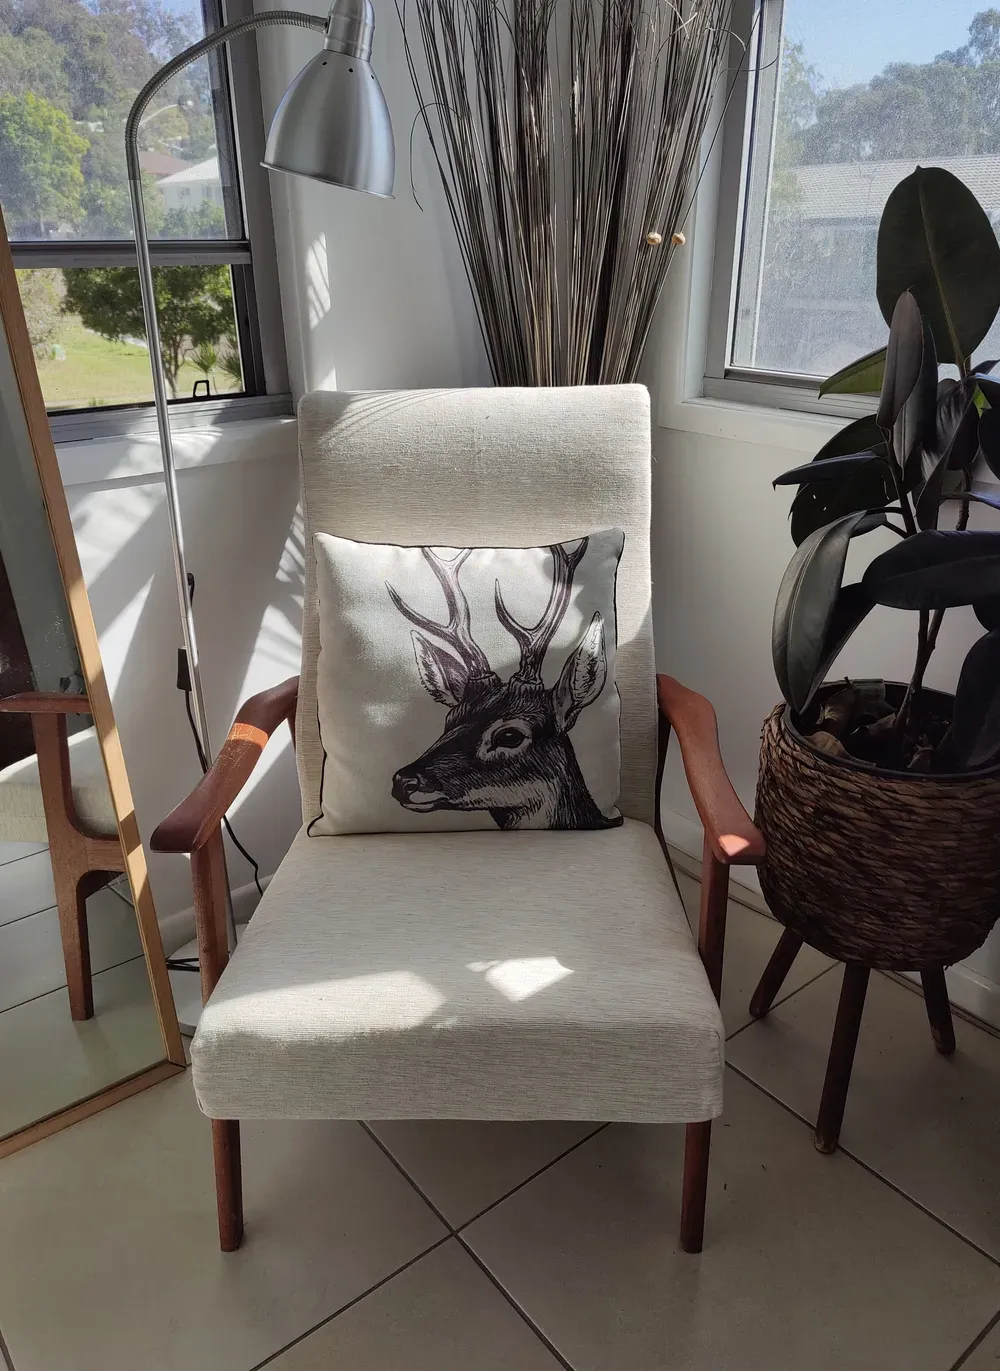
The finished product
Will the cushion actually fit in the sleeve and will it slide onto the chair or rip apart in spectacular fashion?
It fit! And well. So I could take the foam out and complete some finishing touches and refit it.
The end result turned out a lot better than I had imagined. It was a great project to learn how to sew some common and not so common shapes, as well as look at what goes into the thing I plonk my bum on each day. Very rewarding indeed.